Getting started
Dalliance is a track-oriented genome viewer similar to Ensembl, UCSC, or GBrowse. However, it is a little different in operation because it uses recent extensions to web standards ("HTML 5") to offer a higher level of interactivity than most previous genome viewers. You can add your own data using either DAS, or direct access to a range of standard genomic file formats.
Before reading on, you might want to click here to open a genome viewer in a new window.
Navigation
Assuming that all is well, you should see a genome view something like this:
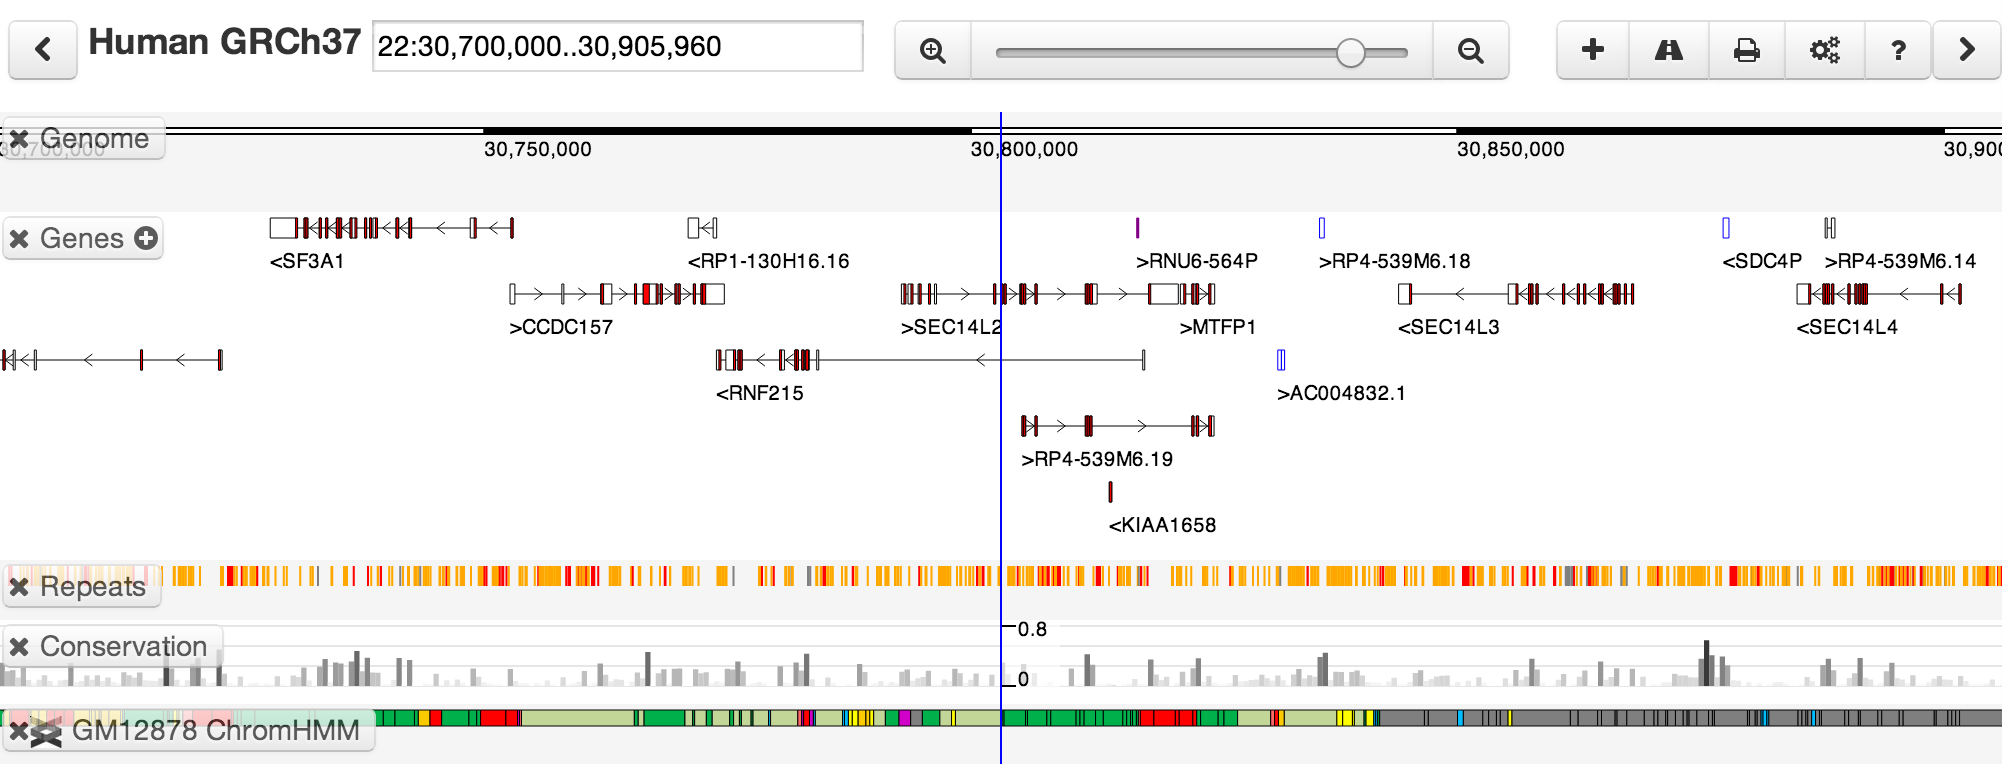
You'll see several distinct tracks of information about the genome. Some, such as the gene structures, are fetched from servers operated as part of the Dalliance project. Others come from elsewhere -- for instance, the chromatin segmentation track comes from the ENCODE analysis trackhub hosted at the EBI.
To move around, point at the background of any of the tracks, hold down the left mouse button, and drag. Alternatively, if your input device supports panning gestures, you can use these instead (e.g. with an Apple Magic Mouse, moving one finger horizontally across the top surface of the mouse will scroll). You can also use the "left" and "right" arrow buttons in the toolbar (NB the meaning of these buttons changes depending on which track is selected), or the arrow keys on your keyboard.
You can scroll in or out by dragging the tab on the zoom slider or using the +/- keys:
If you zoom in far enough, you will eventually see the base-pair-level genome sequence. In the example below, you can see the ATG start codon of the protein-coding part of a gene, and see how sharply the phastCons conservation score increases at the edge of the protein coding region.
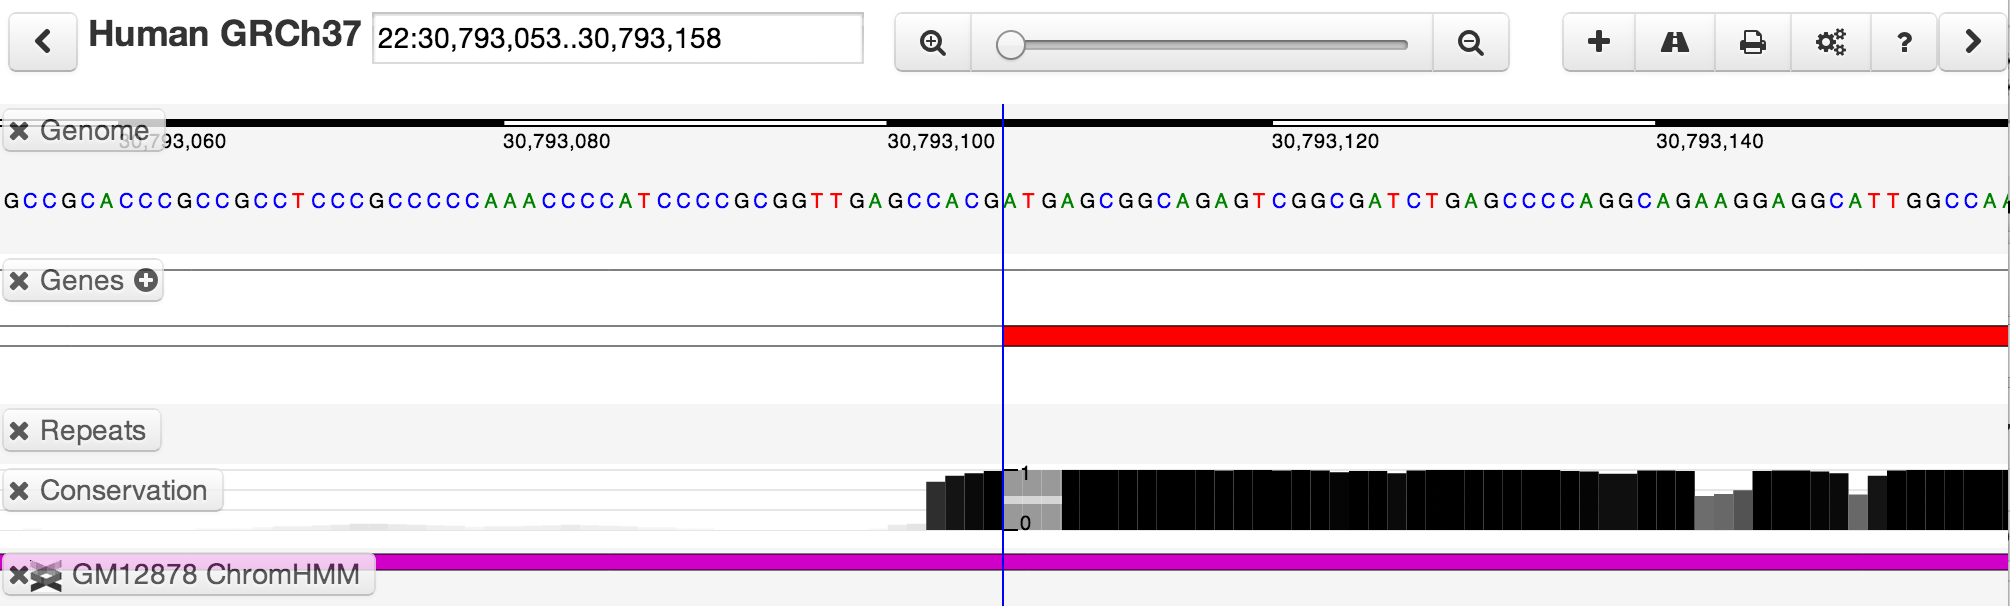
Tapping the space bar allows you to toggle between two zoom levels. By default, the secondary zoom level is a fully-zoomed-in base-pair view.
As you zoom in and out, notice that any feature directly underneath the blue guideline remains centred. You can double-click on any feature to center it, then zoom in to find other features which might be aligned with it. For larger features, you can also double-click close to the edges of the feature to center that edge.
Searching
To jump to specific coordinates, or search for a named feature, type in the location box in the toolbar. If a named feature can be found in any searchable track you currently have active, it will be highlighted in the browser, e.g.: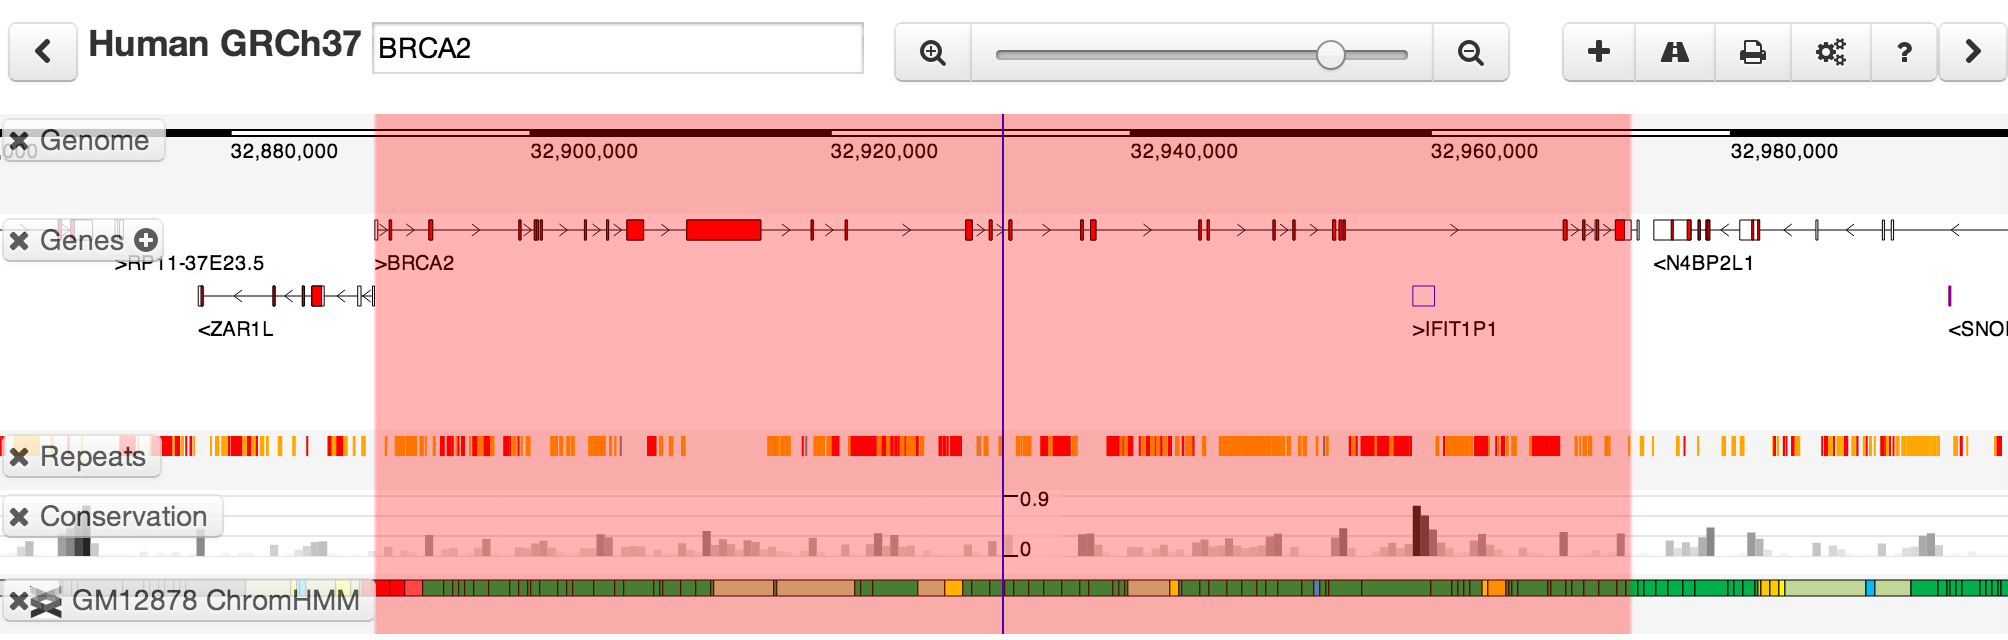
Leaping
You can select a track by clicking once on its label. You can also use the keyboard up and down arrows to quickly switch selected tracks. Some track types support rapid movement between features. We call this "leaping". Leaping is activated by clicking the "left" and "right" buttons in the toolbar. For tracks containing "simple" features (genes, peak calls, etc), leaping will take you to the next feature in the selected direction -- regardless of how far away it might be. You can also leap using CTRL + left/right arrow keys (although note that on Macs, the Mission Control system traps these by default, and you may need to change the Mission Control keyboard settings in the Control Panel). Some quantitative tracks support a variant of leaping where you can select a threshold, and leap to the next region containing scores greated than the selected threshold. If this is available, you'll see a red line indicating the threshold. The threshold can be adjusted in the track editor or using CTRL+UP/DOWN arrows.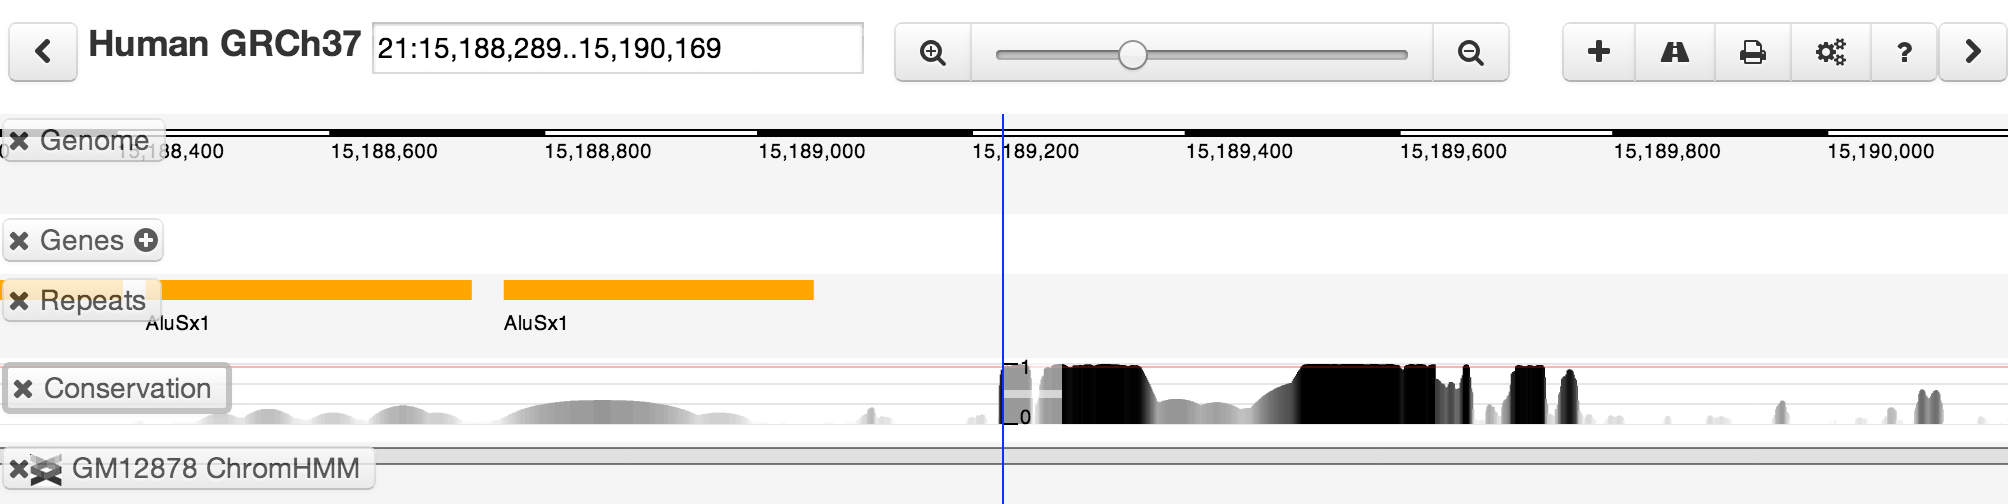
Customizing tracks
You can customize tracks by selecting one then clicking the track button (or pressing "E") to open the track editor
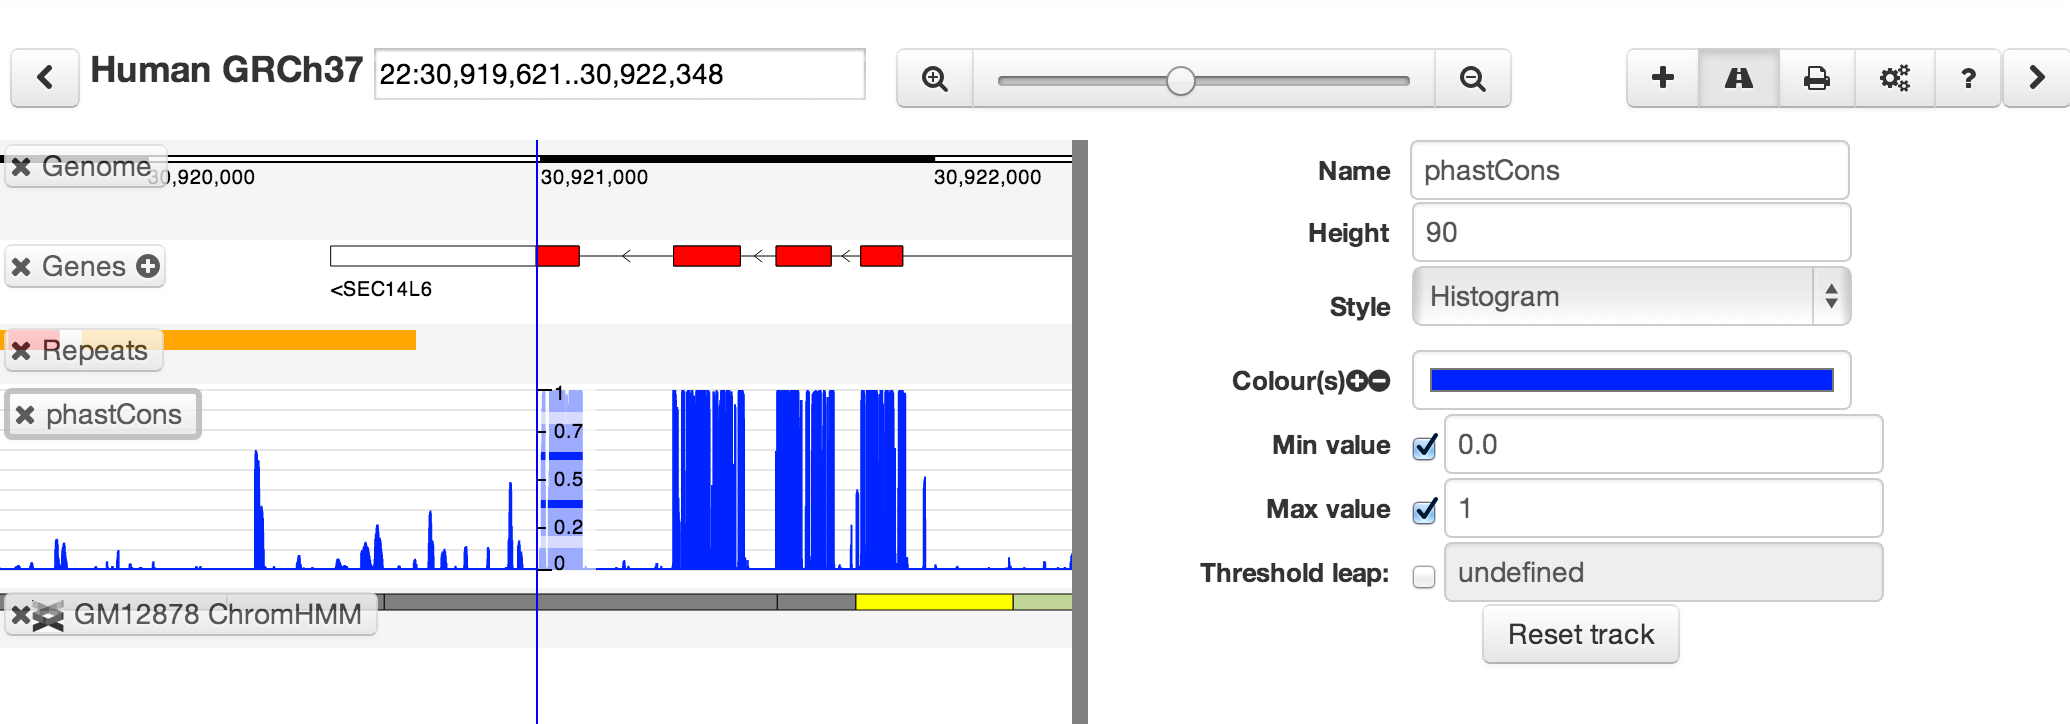
The range of options varies depending on track types. Currently, quantitative tracks are easiest to customize.
You can change the order of tracks by dragging their name-tabs and dropping them elsewhere in the browser display. If you get things too far out of order, you can reset the browser from the Settings panel.